When it comes to traveling and photography, there are many different factors that can affect the quality of your photos. You may be taking pictures in a low-lit room with dark furniture or against a bright sky on the beach. Regardless of what you’re photographing, post-processing is an important step to make sure your images turn out just as you had envisioned them. In this blog post, we will share 10+ tips for editing travel photos like a pro!

Table of Contents
Filters and Presets
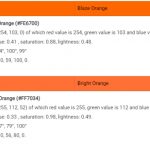
There are many different types of photo filters and presets for different editing needs. Some examples include black & white, sepia tones, warm/cool hues or color saturation adjustments.
Adjust hue/saturation before applying filter to make sure it matches the desired effect you’re after. For example, warmer colors like red, orange and yellow will be more prominent in the photo when using a sepia tone filter while cooler colors like blue, green and purple will become closer to white with black & white filters.
Apply saturation adjustments for certain parts only without affecting how things look when viewing from different angles. For example, if you want to make an area (e.g., flowers against a backdrop of dark foliage) stand out even more than before without making it look unnatural because the colors around them are too saturated as well, start by adjusting saturation levels for just that specific hue and then turn down individual color sliders while keeping others at their original brightness level so that everything still looks natural when seen head on or off angle.
Clean up your composition
You can do this by cropping the photo to remove unwanted objects or zooming in on an area of interest (i.e., a person).
When taking photos, you capture many objects by accident that you don’t want in the picture. By cropping these out, it helps to clean up your composition and make things more focused while also showing what you want the viewer to see.
Zooming in is also a great way to make things more focused and give the photo a better perspective.
Use a vignette to highlight the focus of your photo
A vignette is an effect that darkens or lightens the edges of your image and can be used to draw attention towards a specific area of interest.
There are many different ways to use vignettes, including using them as a finishing touch if you feel like the photo is missing something or making certain elements stand out even more than before by highlighting them with an added darkening effect on just that particular part without affecting other parts of the photo in any way.
A popular choice for travel photographers is applying a black & white filter first and then adding a vignette afterwards. Doing this helps make colors pop while also drawing focus onto what’s important in the picture.
Fix any color issues with white balance and exposure adjustments
If you’re taking pictures indoors, for example, try setting your camera’s mode to “Tungsten.” This will make sure that whites are not too blue from artificial lights.
For outdoor shots, set the white balance manually so there is no weird yellow/green hue cast over everything in the shot due to sunlight quality at different times of day. Similarly, if you find that some areas of your image don’t have enough light because they were shaded when the photo was taken, try to adjust your exposure so that the entire scene is visible.
Shoot on the right setting
If you’re photographing a bright sky with dark foreground elements (e.g., trees), set your camera’s mode to “cloudy” or “shade.” This will ensure that both light and color are even throughout the shot without any drastic changes in contrast when viewing it at different angles of incidence (i.e., base tint).
For darker shots where you want more detail near the subject, try using photos taken in brighter areas as long as they don’t have too much glare from sunlight shining off water or other reflective surfaces like glass windows/mirrors – this can create unwanted specular highlights.
Keep your photo sharp
You can dot it by adjusting the aperture setting to match the scene and depth of field desired.
Generally, you want to keep your aperture low for “blurry background” shots with a shallow depth of field that help emphasize the subject in focus – think portraits or scenic landscape photos taken at midday.
For images where everything is equally important (e.g., an action shot), try using higher apertures so that more detail can be seen throughout all objects within the frame without having anything stand out too much from other elements in the composition – this will create nice contrast between foreground subjects and backgrounds while still keeping them both relatively sharp when viewing it head on.
Adjust brightness/contrast if necessary
If your photo is too dark, try adjusting the brightness settings so that it captures more of the available light in a scene without clipping highlights or shadows – this will make sure you’re able to see all details within an image regardless if there are brighter areas or darker ones near each other without affecting how they appear when viewing them at different angles.
Similarly, adjust contrast levels as needed to accentuate certain colors and tones while keeping everything on an even level with one another.
Use noise reduction
Apply noise reduction for images where there was hand movement during shooting (e.g., using P mode).
This can create distracting patterns like color speckles throughout a photo instead of just clear lines between objects/people in focus versus those out of focus.
Saturation adjustments
Make your colors pop with saturation adjustments! If you want to make certain areas of a scene more prominent, try adjusting the hue and/or saturation levels so that they’re even brighter (but not too much or else it’ll look unnatural).
This can help draw attention towards subjects in an image without making other details less visible as well – just make sure everything is evenly saturated when viewing from different angles by turning down individual color sliders while keeping others at their original brightness level.
Add grain if desired for vintage effects
For example, higher ISO settings will produce digital noise like high contrast streaks throughout photos taken indoors with artificial lighting – turn those up to capture more detail in shadows but make adjustments to the other settings as needed so that everything still looks natural.
Adjust curves and/or levels for specific colors if necessary
If you want a certain area of your photo with an accent color (e.g., red or green) to be more prominent in its own right, try adjusting the curve or level sliders on those particular hues while leaving other areas unchanged – this will make them stand out without affecting how they look at different angles when viewing it from head on versus from off angle where some details may not be visible anymore because of their brightness being washed over by adjacent lights instead.