Navigator is the class behind navigating between the various routes of an application in Flutter. Navigator.pushNamed() method is used to navigate to a route with a pre-defined name, hence named routes.
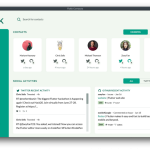
The following approach is what I use in this quiz web app.
Table of Contents
Define a data class aka argument
We create a category data class. When we click a button representing a category, we pass it to the next screen.
class Category {
  final String name;
  final String description;

  Category(this.name, this.description);
}
Define routes
In main.dart, we define the home page (first screen) and quiz page which receives the category parameter.
class MyApp extends StatelessWidget {
  @override
  Widget build(BuildContext context) {
    return MaterialApp(
      title: AppConfig.APP_NAME,
      initialRoute: '/',
      routes: {
        '/': (context) => CategoryPage(),
        '/quiz': (context) =>
            QuizPage(category: ModalRoute.of(context).settings.arguments),
      },
    );
  }
}
Our home “/” is the CategoryPage screen, and the “/quiz” page is QuizPage with category parameter as ModalRoute.of(context).settings.arguments.
ScreenPage
This page loads category data and passes it to QuizPage when a respective action is performed.
I only post the code of a button in CategoryPage here.
ElevatedButton(
    child: Text('Next page'),
    onPressed: () {
      Navigator.pushNamed(context, QuizPage.routeName,
          arguments: Category('technology', 'This category consists of technology-related articles.'));
    },
)
QuizPage
On this page, we define the Category as a field and then use the argument as a class field normally.
class QuizPage extends StatefulWidget {
  static const routeName = '/quiz';
  final Category category;

  const QuizPage({Key key, this.category}) : super(key: key);

  @override
  _QuizPageState createState() => _QuizPageState();
}

class _QuizPageState extends State<QuizPage> {
	@override
	Widget build(BuildContext context) {
		return Scaffold(
		    appBar: AppBar(title: Quiz),
		    body: SafeArea(
		      child: Text(widget.category.name),
		    ),
		);
	}
}