Google Docs is a free online word processing tool that allows users to create and edit documents. It has many of the same features as Microsoft Word, including the ability to format text and add images.
Google Docs is designed for collaboration, with easy ways to share documents and work on them together in real-time. It also has built-in chat and comment features, so you can discuss your work with others as you go.
If you’re just getting started with Google Docs, you may be wondering where to start. There are so many features and options available in Google Docs, it can be tough to know where to begin. In this post, we’ll share some tips and tricks for beginners who want to get the most out of Google Docs.
Table of Contents
Top Google Docs Tips and Tricks
Share your Docs with other people
- File > Share > Share with others
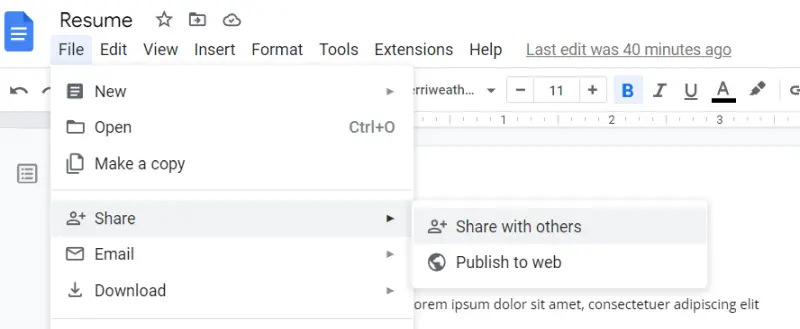
When you share your documents with other people, you open up the possibility of expanding your knowledge base. By sharing your work, you allow others to offer their feedback and input. This can help to improve the quality of your work and make it more informative.
Additionally, sharing your documents can also lead to new opportunities. For example, if you share your work with a publishing company, they may be interested in publishing it. This can help to broaden your audience and reach new readers.
Edit uploaded image
An image can help to deepen the knowledge and understanding of your audience, so you better apply it. An image can be edited in Google Docs, and adding some features could make it pop out more. It can be modified with Google Docs’ built-in image editor.
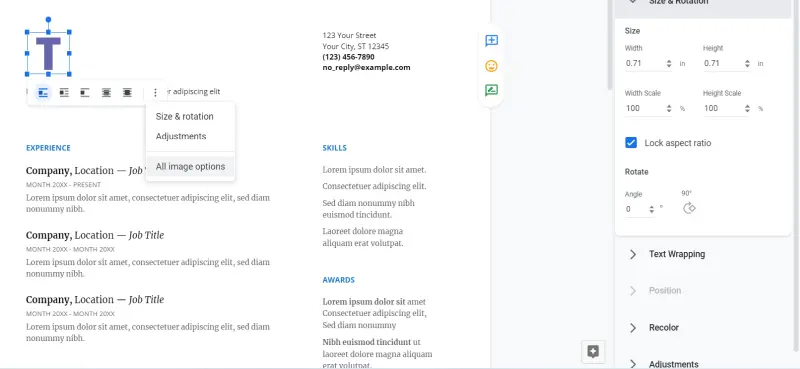
- Click on the image you want to edit.
- Click on the vertical 3-dots menu item.
- Open All image options.
You can carry out some basic image filters like re-coloring, and changing brightness and contrast.
Tag your colleagues in a document
If you’re working on a Google Docs document and want to let your colleagues know about it, there’s a simple way to do so. Just type the + or @ sign, followed by their name. This will tag them in the document, and they’ll receive a notification letting them know about it.
This is a great way to keep everyone in the loop on what you’re working on. Just be sure not to overdo it with the tagging – too many notifications can be just as annoying as none at all!
Insert Google Maps
If you’re looking to add a location on Google Maps to your document, there’s no need to go elsewhere – Google Docs has you covered.
This can be useful if you’re writing about a specific location and want to include a map for reference. It is especially helpful for jobs that involve giving tours, as you can easily send your customers a clear copy of the map of your destination.

To do this, simply type @ symbol then enter the address or place name that you want to map. The map will be inserted into your document.
Learn shortcuts
Being able to know shortcuts while using Google Docs can help make things faster and more efficient.
For example, knowing that “ctrl + c” is the shortcut for copy and “ctrl + v” is the shortcut for paste can help avoid having to go up to the top ribbon to click on the copy or paste button every time. Instead, you can just use the keyboard shortcut and get it done much faster.
Another example is “ctrl + b” for bolding text or “ctrl + i” for italicizing text. These shortcuts are extremely helpful when trying to format a document quickly.
Many other shortcuts can be useful when using Google Docs, so it is worth taking the time to learn some of them. Doing so will save you a lot of time in the long run.
You can view all Google Docs hotkeys here.
Adjust page setup
As anyone who spends a lot of time on the computer knows, page setup can be a real pain. Whether you’re trying to format a document for printing or adjust the margins so that your text will fit on the screen, it can be tough to get everything just right.
Fortunately, Google Docs makes it easy to adjust your page setup. By going to the Page Setup option in the File menu, you can quickly change your page size, orientation, and margins.
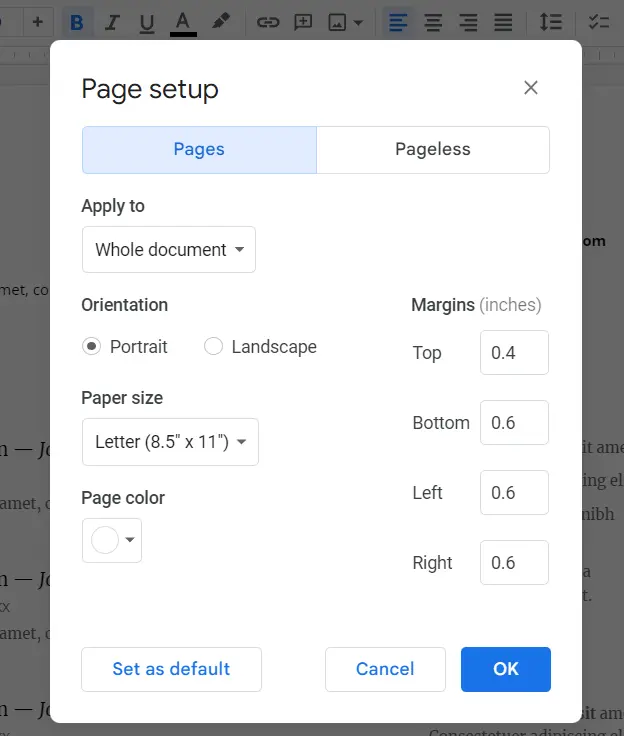
And if you need to make further adjustments, you can always use the “Custom Margins” option to fine-tune your settings.
Translate the whole document
When using Google Docs, you may want to consider translating your document into another language. This can be a useful way to expand the reach of your document and break down language barriers.
To translate a document, simply go to the Tools menu and select Translate document. From there, you can choose from a variety of languages into which you would like to translate your document.
Keep in mind, however, that Google’s translation tool is not perfect, so you may want to proofread your translated document before sharing it with others. Nevertheless, this can be a quick and easy way to make your document accessible to a wider audience.
Offline Editing
Offline editing is a great feature of Google Docs. It allows you to keep working on your documents even if you are not connected to the internet. All the changes you make will be automatically saved, and they will be synced to the cloud as soon as you are back online.
This is a great way to ensure that you never lose any progress on your work, even if you are in a place with poor or no internet connection.
Best of all, it is very easy to use. Simply enable Make avalable offline in the File menu, and then you can start working on your documents even when you are not connected to the internet.
Split text into columns
When you want to format a document into multiple columns in Google Docs, it’s easy to do. Just click on the Format menu option and hover over Columns. You’ll see icons for pages with one, two, or three columns. Click on the icon for the number of columns you want, and your document will automatically adjust.
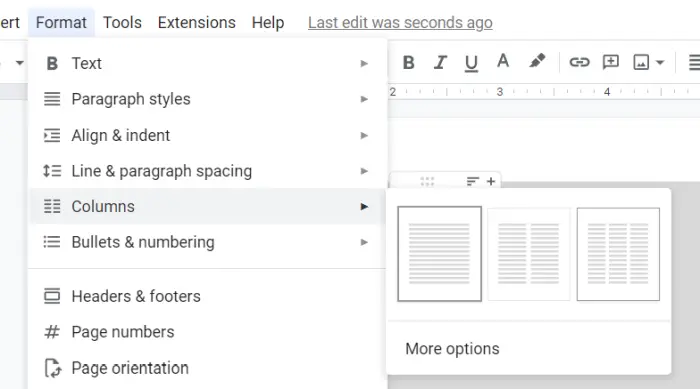
You can also add additional formatting options, such as width and spacing, by clicking on the More options button. So whether you’re working on a newsletter or creating a brochure, formatting your document into columns is a simple way to give it a professional look.
Install Add-ons/Extensions
Google Docs is a great word processing tool, but it can be even better with the right extensions. Extensions are like apps for Google Docs, and they can do everything from helping you track your progress on a document to automatically creating citations.
- Extensions > Add-ons > Get add-ons
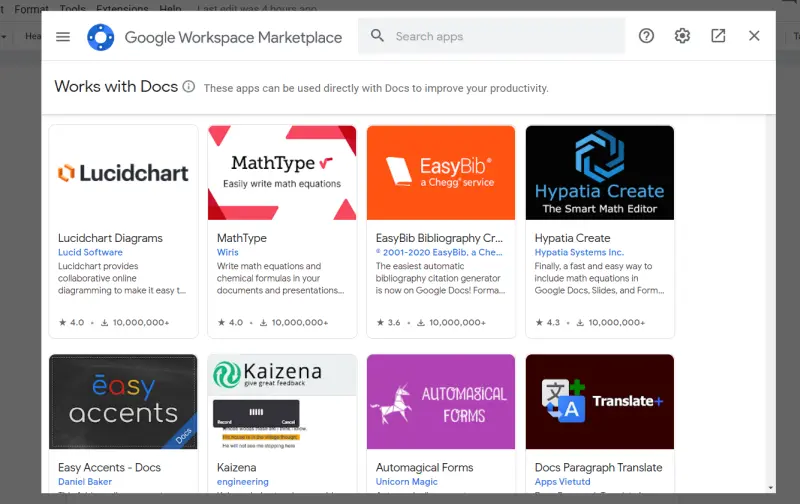
You can also browse the Extension Gallery to find extensions that have been recommended by the Google Docs team. Once you’ve found an extension that you want to install, click on the “Install” button.
After the extension is installed, you may need to restart Google Docs for it to take effect. Be sure to read the permissions carefully before installing any extension, as some extensions may request access to sensitive data such as your browsing history.
Use Suggesting mode
If you’ve ever used Microsoft Word, you’re probably familiar with the Comments feature. Google Docs has a similar feature called “Suggesting.” Suggesting mode is great for when you want to make changes to a document but don’t want to make the changes yourself.
To switch to Suggesting mode, open the document you want to edit and click the pencil icon at the top right. Then, select “Suggesting” from the drop-down menu.

Once you’re in Suggesting mode, any changes you make will be highlighted in yellow. You can also leave comments by selecting some text and then clicking the comment icon at the top of the screen.
If someone else is also editing the same document, they’ll be able to see your suggestions and comments. And if they accept your suggestions, the changes will be applied to the document.
Draft emails
Ever find yourself needing to write an email but wanting to take advantage of the Google Docs spell checker? Well, there’s a nice trick for that. You can actually draft your email in Google Docs and then úe Gmail to send it.
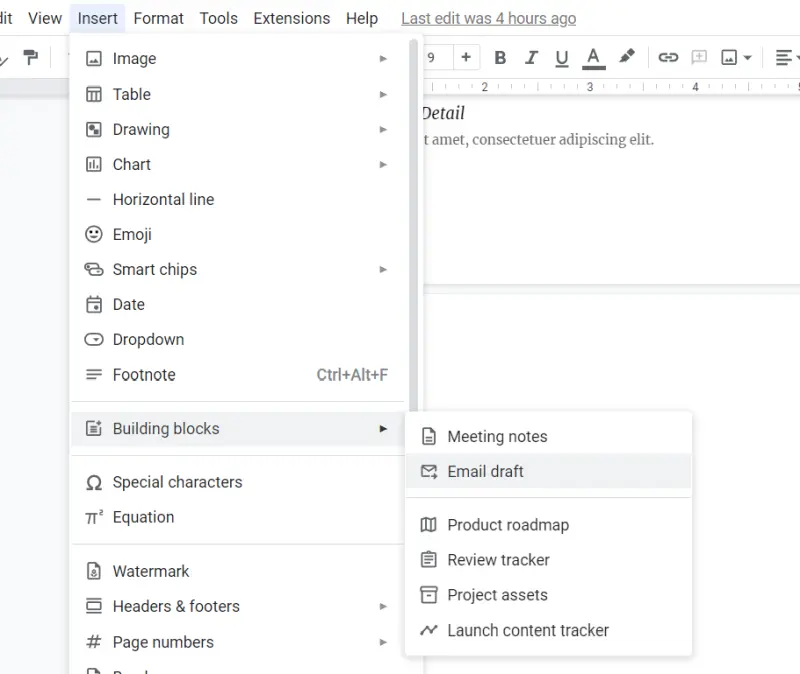
It’s super easy to do. Just click on Insert > Building Blocks > Email draft. From there, you’ll be able to compose your email and send it directly from Gmail by clicking on the Gmail icon.
Change to Landscape orientation
It is natural that you always want to have the best view of your documents on the web. Meanwhile, the most documents on the web are in a portrait orientation. Well, do you want to change it to landscape orientation?
The first step to do is to click the File menu on the top of your screen. Then, you can proceed to the Page setup on the expanded menu. There, you can find options for landscape and portrait orientation. It also includes paper size settings wherein you can set the inches, size, and margin and background color. You can change the color background with your custom hex color code.
As you set the orientation in the landscape, you can have wider tables and images compared to portrait orientation. You can select the Set as the default option if you need to work on a multi-document project with a landscape orientation. However, you must also learn about the consequences of changing the orientation settings in Google Docs. Among its drawbacks is that you can change the document’s entire orientation, but can’t set it for single pages.
Another disadvantage of changing to landscape orientation is that the media in the document can be reordered or changed in unintended ways if you make documents in portrait orientation and switch it to landscape orientation. It requires you to do manual cleanup which is time-consuming.
Google Docs Hotkeys
| Copy | Ctrl + C |
| Cut | Ctrl + X |
| Paste | Ctrl + V |
| Paste without formatting | Ctrl + Shift + V |
| Undo | Ctrl + Z |
| Redo | Ctrl + Shift + Z |
| Insert or edit link | Ctrl + K |
| Open link | Alt + Enter |
| Show common keyboard shortcuts | Ctrl + / |
| Save Every change is automatically saved in Drive | Ctrl + S |
| Ctrl + P | |
| Open | Ctrl + O |
| Find | Ctrl + F |
| Find and replace | Ctrl + H |
| Find again | Ctrl + G |
| Find previous | Ctrl + Shift + G |
| Hide the menus (compact mode) | Ctrl + Shift + F |
| Insert page break | Ctrl + Enter |
| Search the menus | Alt + Z Alt + / |
| Text formatting | |
|---|---|
| Bold | Ctrl + B |
| Italicize | Ctrl + I |
| Underline | Ctrl + U |
| Strikethrough | Alt + Shift + 5 |
| Superscript | Ctrl + . |
| Subscript | Ctrl + , |
| Copy text formatting | Ctrl + Alt + C |
| Paste text formatting | Ctrl + Alt + V |
| Clear text formatting | Ctrl + |
| Increase font size | Ctrl + Shift + > |
| Decrease font size | Ctrl + Shift + < |
| Paragraph formatting | |
| Increase paragraph indentation | Ctrl + ] |
| Decrease paragraph indentation | Ctrl + [ |
| Apply normal text style | Ctrl + Alt + 0 |
| Apply heading style [1-6] | Ctrl + Alt + [1-6] |
| Center align | Ctrl + Shift + E |
| Right align | Ctrl + Shift + R |
| Justify | Ctrl + Shift + J |
| Numbered list | Ctrl + Shift + 7 |
| Bulleted list | Ctrl + Shift + 8 |
| Images and drawings | |
| Resize larger | Ctrl + Alt + K |
| Resize larger horizontally | Ctrl + Alt + B |
| Resize larger vertically | Ctrl + Alt + I |
| Resize smaller | Ctrl + Alt + J |
| Resize smaller horizontally | Ctrl + Alt + W |
| Resize smaller vertically | Ctrl + Alt + Q |
| Nudge up, down, left, or right | Arrow keys |
| Nudge by a pixel | Shift + Arrow keys |
| Rotate clockwise by 15° | Alt + Right arrow |
| Rotate counterclockwise by 15° | Alt + Left arrow |
| Rotate counterclockwise by 1° | Alt + Shift + Left arrow |
| Rotate clockwise by 1° | Alt + Shift + Right arrow |
| Close drawing editor | Ctrl + Esc Shift + Esc |
| Comments | |
| Insert comment | Ctrl + Alt + M |
| Open discussion thread | Ctrl + Alt + Shift + A |
| Enter current comment | holding Ctrl + Alt, press E then C |
| Move to next comment | holding Ctrl + Alt, press N then C |
| Move to previous comment | holding Ctrl + Alt, press P then C |
| Insert footnote | Ctrl + Alt + F |
| Enter current footnote | holding Ctrl + Alt, press E then F |
| Move to next footnote | holding Ctrl + Alt, press N then F |
| Move to previous footnote | holding Ctrl + Alt, press P then F |
| Menus | |
| Context (right-click) menu | Ctrl + Shift + X |
| File menu | Alt + F |
| Edit menu | Alt + E |
| View menu | Alt + V |
| Insert menu | Alt + I |
| Format menu | Alt + O |
| Tools menu | Alt + T |
| Table menu | Alt + B |
| Help menu | Alt + H |
| Accessibility menu (present when screen reader support is enabled) | Alt + A |
| Input Tools menu (available in documents in non-Latin languages) | Ctrl + Alt + Shift + K |
| Toggle input controls (available in documents in non-Latin languages) | Ctrl + Shift + K |
| Text selection with keyboard | |
| Select all | Ctrl + A |
| Extend selection one character | Shift + Left/right arrow |
| Extend selection one line | Shift + Up/down arrow |
| Extend selection one word | Ctrl + Shift + Left/right arrow |
| Extend selection to the beginning of the paragraph | Ctrl + Shift + Up arrow |
| Extend selection to the end of the paragraph | Ctrl + Shift + Down arrow |
| Select current list item | holding Ctrl + Alt + Shift, press E then I |
| Select all list items at current level | holding Ctrl + Alt + Shift, press E then O |
| Text selection with mouse | |
| Select word | Double-click |
| Extend selection one word at a time | Double-click + drag |
| Select paragraph | Triple-click |
| Extend selection one paragraph at a time | Triple-click + drag |
| Screen reader support | |
| Enable screen reader support | Ctrl + Alt + Z Alt + Shift + ~ |
| Speak selection | Ctrl + Alt + X |
| Speak from cursor location | Ctrl + Alt + R |
| Announce cursor location | holding Ctrl + Alt, press A then L |
| Announce formatting at cursor location | holding Ctrl + Alt, press A then F |
| Speak the table column and row header | holding Ctrl + Alt + Shift, press T then H |
| Speak the table cell location | holding Ctrl + Alt + Shift, press T then N |
| Speak the table row header | holding Ctrl + Alt + Shift, press T then R |
| Speak the table column header | holding Ctrl + Alt + Shift, press T then C |