Posting a project to GitHub as a repository is quite easy in Android Studio.
Requirements:
- GitHub account.
- Download Git and install it from https://git-scm.com/downloads.
- Android Studio.
Connect GitHub to Android Studio:
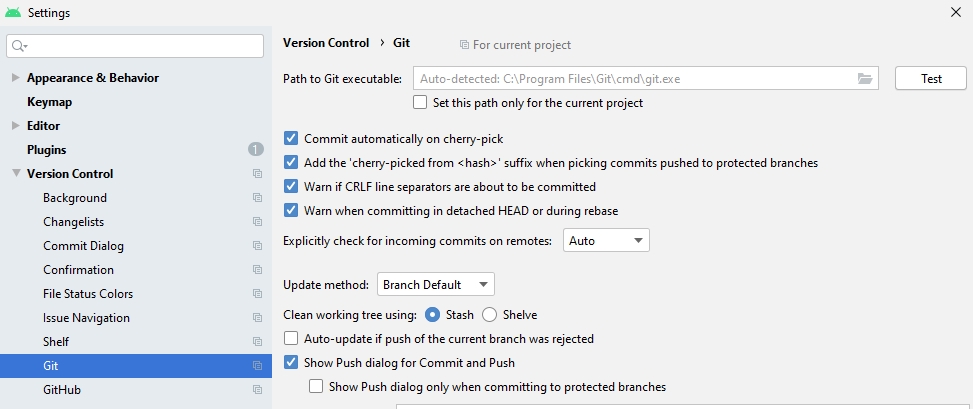
- Go to
File -> Settings -> Version Control -> Git, while a project is being opened - Click the
Testbutton on the same line asPath to Git executablea field to see whether Git is working. This field is auto-filled if you installed Git from the link above. - Go to
File -> Settings -> Version Control -> GitHuband choose Add account then fill in your GitHub username and password.
Share project to GitHub
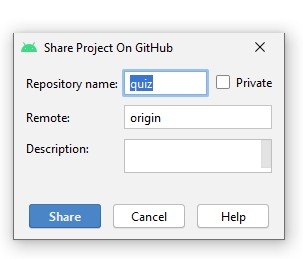
- While opening a project, access
VCS -> Import into Version Control -> Share Project on GitHub. - Input the required information on the popup then
Share.
More details:
- Create a GitHub account if you don’t have one. You can do this by visiting github.com and signing up.
- Open your Android Studio project that you want to post on GitHub.
- Go to “VCS” on the top menu bar and select “Import into Version Control”, then click on “Share Project on GitHub”.
- A new window will appear asking for your GitHub login credentials. Enter your GitHub username and password.
- Next, you’ll need to fill out some basic information about your project. Enter a name for your repository and a description. You can also choose whether to make it public or private.
- Click the “Share” button to create the repository on GitHub.
- After the repository has been created, you’ll need to commit and push your changes to GitHub. To do this, go to “VCS” select “Git” and then “Commit”. Make sure to select all the files that you want to commit.
- After committing, go to “VCS” again and select “Git” and then “Push”. This will push your changes to the GitHub repository.
- You can now go to your GitHub account and see your project repository. Congratulations, you’ve successfully posted your project to GitHub!