In today’s digital age, it’s more important than ever to take steps to protect your online privacy. With all of the sensitive information, we share online – from our banking login to our photos – we must do everything we can to keep that information safe from prying eyes. That’s where a VPN comes in.
A VPN, or Virtual Private Network, encrypts your internet traffic so that no one can snoop on your online activity. And setting one up on your Android phone is easier than you might think.
In this article, we will introduce 2 ways to setup VPN on any Android devices.
Table of Contents
Use Free VPN Book Account
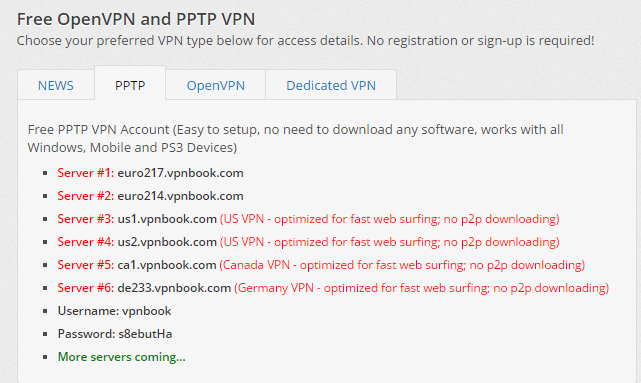
VPNBook is a free and secure VPN service provider that encrypts your internet connection and routes all your traffic through an encrypted tunnel. It uses the most advanced cryptographic techniques to keep you safe on the internet from prying eyes and hackers.
With VPNBook, you can bypass government censorship and defeat corporate surveillance and monitoring by your ISP. VPNBook strives to keep the internet a safe and free place by providing free and secure PPTP and OpenVPN service access for everyone. You can also use VPNBook to unblock websites, hide your IP address, protect your privacy, and prevent ISP tracking.
With this approach, we will set up the VPN server with free ones from https://www.vpnbook.com with the PPTP method on Android.
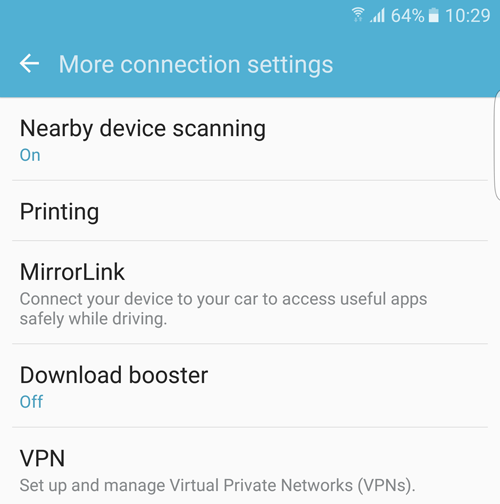
Step 1: Go to the “VPN” menu item.
Depending on the Android version and devices, this menu item can be accessed on different parent menus. It usually lies under the “Wireless And Network settings” for older Android versions or “More connection settings” for newer Android ones. It lies under “More connection settings” in my case.
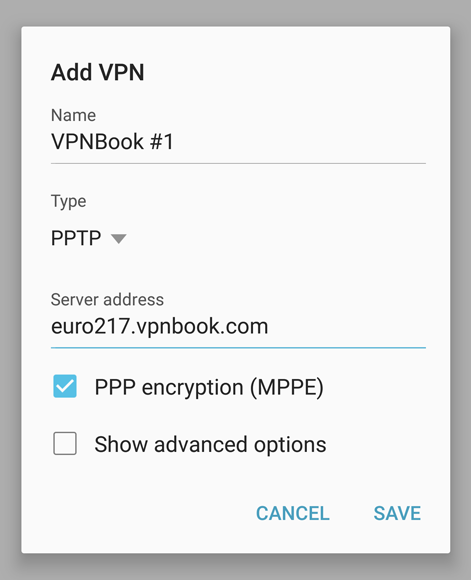
Step 2: Add a new VPN
Tap on the “Add VPN” button at the top right corner. A dialog appears and displays the connection name and a list of various types of VPNs. Fill in the name, and server address and select PPTP type then click “Save”.
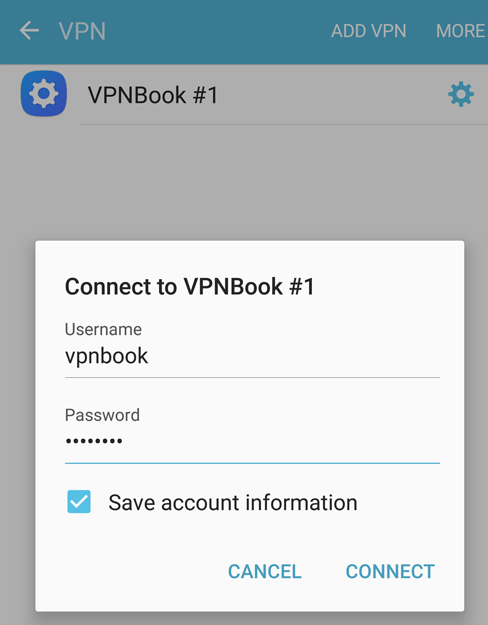
Step 3: Add username and password
Tap on the created VPN connection to open a new dialog for the user and pass input.
Step 4: Connect to your VPN
With just a single tap on the created VPN on the VPN list, your device is connected to VPN.
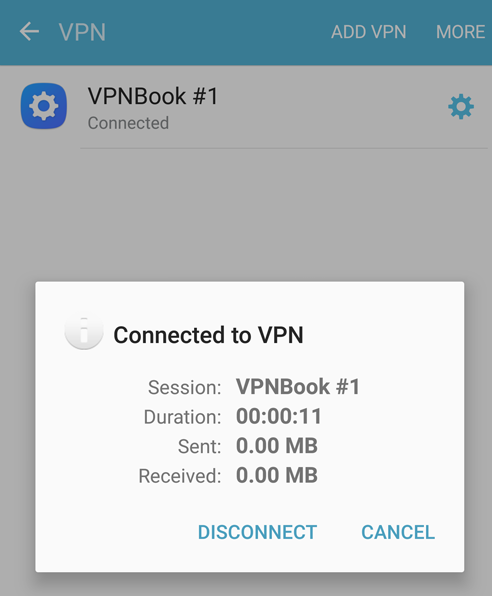
Step 5: Disconnect
After your device is connected, clicking the VPN connection will open a new dialog that shows downloaded and uploaded data and a button to disconnect from the service.
Use a VPN App
Android has many VPN apps available for download, and most of them are easy to use. All you have to do is open the app, input your login information, and you’re good to go.
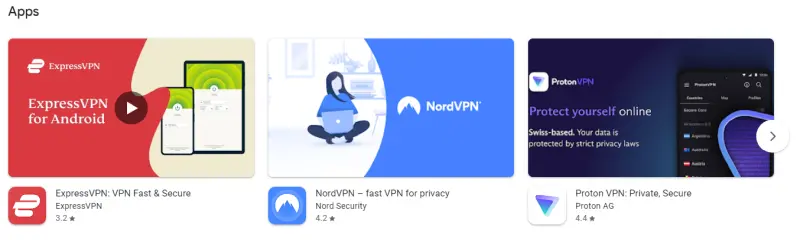
Some of the more popular VPN apps for Android include TunnelBear, NordVPN, ExpressVPN, and CyberGhost. These apps provide a wide range of features, including the ability to choose from a variety of servers around the world, as well as military-grade encryption to keep your data safe.
Steps to install and enable VPN connection:
- Download a VPN app from the Google Play Store. For this example, we’ll use ExpressVPN.
- Open the app and sign in with your account credentials (or create an account if you don’t have one already).
- Select a server location from the list of available options. For this example, we’ll select the United States – New York.
- Once connected, you’ll see a notification indicating that you are now protected by ExpressVPN. You can also choose to have the app automatically connect whenever you open it or whenever you join a new Wi-Fi network.
Nowadays, there are plenty of reasons to use a VPN on your phone. Whether you’re concerned about online privacy or just want to access geo-blocked content like Netflix or BBC iPlayer while traveling abroad, a VPN is a handy tool to have in your pocket. And thanks to the ease of setting one up on Android, there’s really no excuse not to use one. So go ahead and give it a try – you might be surprised at how much you like it!