One of the most common issues that Flutter developers face is the CERTIFICATE_VERIFY_FAILED error while performing a POST request. This error occurs when the SSL certificate verification fails for a particular endpoint. In this article, we will discuss how to solve this error in Flutter.
You will see the following error when sending an API request to an HTTPS endpoint:
HandshakeException: Handshake error in client (OS Error: CERTIFICATE_VERIFY_FAILED: unable to get local issuer certificate(handshake.cc))When a Flutter application makes a POST request to a server, it verifies the SSL certificate of the server to ensure that the communication is secure. If the SSL certificate verification fails, the application throws the CERTIFICATE_VERIFY_FAILED error. This error occurs due to various reasons, such as an expired or invalid SSL certificate, a mismatch in the domain name, or an untrusted root certificate authority.
There are 2 ways to solve this issue: enabling bad requests or including the requested SSL certificate.
Include the Requested SSL Certificate
we need to add the SSL certificate of the server to the trusted certificates list of our Flutter application. Let’s follow the steps below to do that:
Step 1: Download the SSL certificate
Firstly, we need to download the SSL certificate from the server. We can do this by navigating to the URL of the server in a web browser and clicking on the lock icon in the address bar. This will display the SSL certificate of the server. We can then download the SSL certificate by following the instructions provided by the browser.
Alternatively, we can download the SSL certificate from the official website of Let’s Encrypt at https://letsencrypt.org/certs/lets-encrypt-r3.pem.
Step 2: Add the SSL certificate to the Flutter project
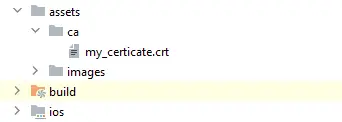
Once we have downloaded the SSL certificate, we need to add it to our Flutter project. To do this, we can create a new directory named ‘ca’ in the root directory of our Flutter project and save the SSL certificate in this directory.
Step 3: Add the directory to the pubspec.yaml
After adding the SSL certificate to the Flutter project, we need to add the ‘ca’ directory to the pubspec file of our project. We can do this by adding the following lines to the pubspec.yaml file:
assets:
    - assets/ca/
This will ensure that the ‘ca’ directory is included in the assets of our Flutter application.
Step 4: Set the trusted certificates
Now that we have added the SSL certificate to our Flutter project, we need to set it as a trusted certificate. We can do this by adding the following code to the main() function of our Flutter application:
Future<void> main() async {
  WidgetsFlutterBinding.ensureInitialized();

  ByteData data = await PlatformAssetBundle().load('assets/ca/my_certicate.crt');
  SecurityContext.defaultContext.setTrustedCertificatesBytes(data.buffer.asUint8List());

  runApp(
    MultiProvider(
      providers: [
        ChangeNotifierProvider(create: (context) => UserProvider()),
      ],
      child: MyApp(),
    ),
  );
}
This code loads the SSL certificate from the ‘ca’ directory and sets it as a trusted certificate in the SecurityContext of our Flutter application.
Enable Bad Requests
This method is not recommended. You should use it in the development environment only.
Add the following codes to bypass the certificate request:
class MyHttpOverrides extends HttpOverrides{
  @override
  HttpClient createHttpClient(SecurityContext? context){
    return super.createHttpClient(context)..badCertificateCallback = (X509Certificate cert, String host, int port) => true;
  }
}

Future<void> main() async {
  HttpOverrides.global = MyHttpOverrides();
}
If you are using Dio, add this:
Dio dio = new Dio();
(dio.httpClientAdapter as DefaultHttpClientAdapter).onHttpClientCreate =
    (HttpClient client) {
  client.badCertificateCallback =
      (X509Certificate cert, String host, int port) => true;
  return client;
};