When it comes to connectivity Windows 10 is very reliable. However, it isn’t bulletproof meaning you may encounter some problems such as no network access. Have you ever encountered an “Unidentified Network” or “No Network Access” error while using Windows 10? These errors can be frustrating and make it difficult to connect to the internet.
To fix the problem you will need to follow these simple steps. All of you can do it within seconds so you can get a clear idea of how easy it is.
Table of Contents
Check Your Internet Connection
The first step is to check your internet connection. If your internet connection is down, then it’s likely that you’re experiencing these issues with your computer as well. If so, try restarting your modem/router or contact your ISP for help.
It’s also possible that you’ve connected to the wrong Wi-Fi network. To verify this, open the Network & Sharing Center (Control Panel >Network & Sharing Center) and select “Change adapter settings” from the left sidebar. Then, double-click on your current connection and make sure that it matches what you intended to connect to.
Using the Command Prompt to Reset IP and Flush DNS
To open the command prompt you will need to go to the Start menu and search for the command prompt. Once you located it, right-click on the icon and click run as administrator. The method may not work if you simply open the command prompt using the left click. If you have a desktop shortcut, click on it using the right click and run as administrator. In addition, this method allows you to reset WinSock which caused the problem.
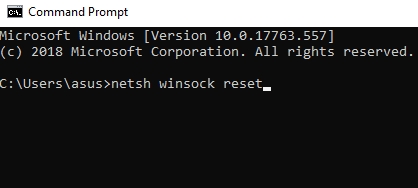
Type or paste netsh winsock reset and press enter.

netsh winsock reset
Once you are done, you will need to enter netsh int ip reset and press enter again.
netsh int ip reset
Make sure to enter the code properly and precisely as it is mentioned here. Even the smallest mistake will result in failure.
Then type in ipconfig /flushdns
ipconfig /flushdns
This code is used to reset DNS information and it must be used. Simply paste it to the command prompt, you can use CTRL+V and press enter.
Disable IPv6
In some cases, disabling IPv6 may help if you’re having trouble connecting to a specific type of network (such as an Ethernet or Wi-Fi network). To do this, open the Network & Sharing Center again, select “Change adapter settings” from the left sidebar, then right-click on your active adapter and select “Properties” from the dropdown menu. In the Properties window, uncheck the box next to “Internet Protocol Version 6 (TCP/IPv6)” and click OK.
Reboot the Computer
Many users enter all the commands properly but they do not reboot the computer. This is a common issue and here is why you need to reset it. Once all the steps have been completed, you need to reboot the Windows in order for the changes to take effect. If you don’t reboot it, nothing will happen.
Once you have rebooted, the system you can connect to the network once again and continue browsing the internet. Keep in mind that you must enter the password again, due to fact when you reset the WinSock, the saved passwords will be removed. If the problem persists, you can reset the Network in the settings.
Conclusion
All operating systems have some issues and Windows 10 is no different. This guide will help you solve one of the most common and annoying problems some users may encounter. In general, you will need average skills and a few minutes of your time. If the problem occurs again, simply repeat all the steps.


