Google has made it much more easier for developer to create an app with Navigation Drawer since Google’s I/O in 2015. In this tutorial, I will introduce how to switch among fragments when an item on navigation drawer is clicked.
- Create Drawer Navigation project
- Add blank fragment
- Add list fragment
- Add FrameLayout to MainActivity’s layout
- Switch Fragment on menu item click event
Table of Contents
Create Drawer Navigation project
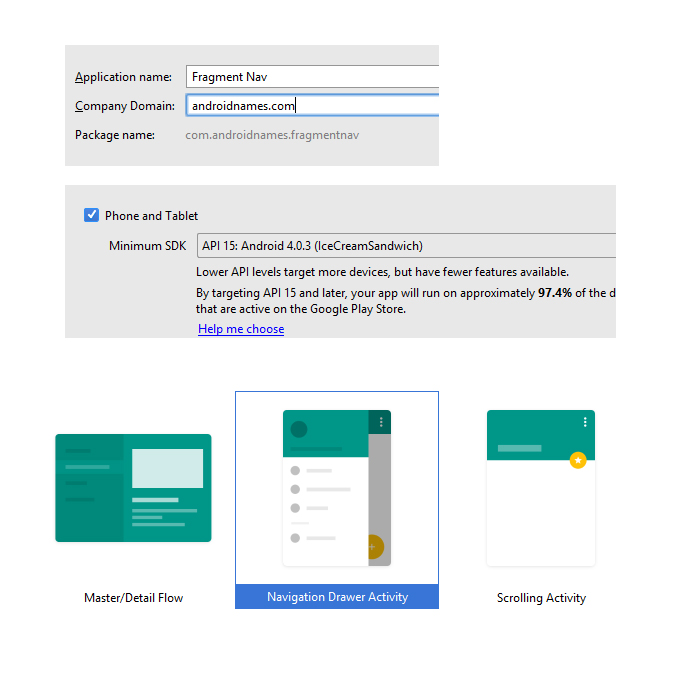
Start a new Android project with Navigation Drawer Activity. Fill in project info as in following image:
Out default Activity is MainActivity.java.
Add blank fragment
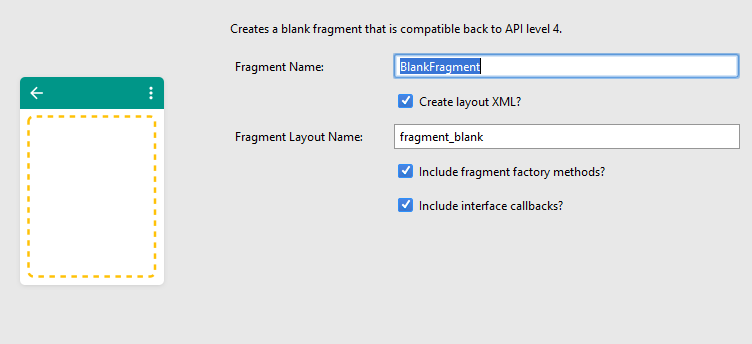
Let’s add a blank fragment named BlankFragment.java by clicking on package name > New > Fragment > Fragment (Blank). You don’t need to change any default settings generated by Android Studio.
Add list fragment
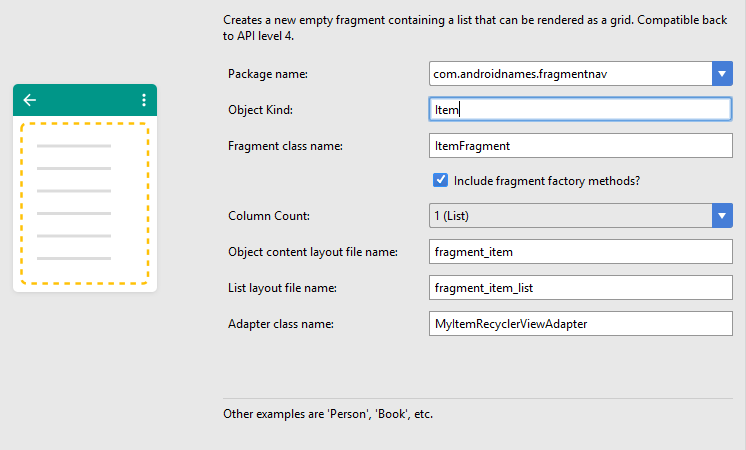
Similar to step above, add a list fragment named ItemFragment.java by clicking on package name > New > Fragment > Fragment (List). There are more info to fill in in this step because Android Studio auto-generate RecyclerView with its adapter. However, to keep it simple, let’s keep what Android Studio give us.
Add FrameLayout to MainActivity’s layout
Open content_main.xml and replace the default TextView widget with a FrameLayout. It is used to display fragment.
[xml]
<?xml version="1.0" encoding="utf-8"?>
<RelativeLayout xmlns:android="http://schemas.android.com/apk/res/android" xmlns:app="http://schemas.android.com/apk/res-auto" xmlns:tools="http://schemas.android.com/tools" android:layout_width="match_parent" android:layout_height="match_parent" android:paddingBottom="@dimen/activity_vertical_margin" android:paddingLeft="@dimen/activity_horizontal_margin" android:paddingRight="@dimen/activity_horizontal_margin" android:paddingTop="@dimen/activity_vertical_margin" app:layout_behavior="@string/appbar_scrolling_view_behavior" tools:context="com.androidnames.fragmentnav.MainActivity" tools:showIn="@layout/app_bar_main">
<FrameLayout android:layout_width="match_parent" android:layout_height="match_parent" android:id="@+id/mainFrame" />
</RelativeLayout>
[/xml]
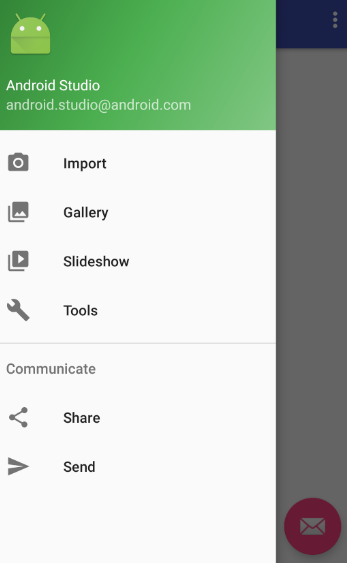
Switch fragment on menu item click event
There are several default menu items. I will use Import menu to display BlankFragment and Gallery one to display ListFragment.
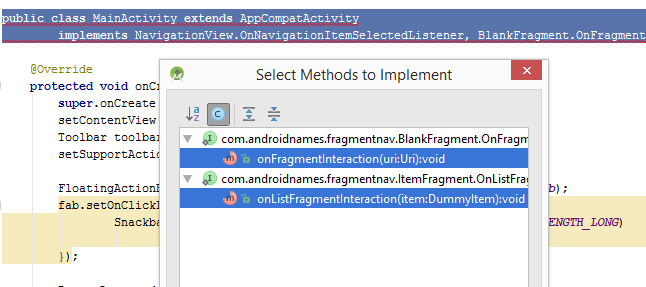
This step requires MainActivity.java modification only. Open MainActitivy.java and implement OnFragmentInteractionListener of 2 fragments first.
[java]
public class MainActivity extends AppCompatActivity
implements NavigationView.OnNavigationItemSelectedListener, BlankFragment.OnFragmentInteractionListener, ItemFragment.OnListFragmentInteractionListener
[/java]
Android Studio will show error. Click on the red bulb and choose “Implement methods”. The 2 methods are onFragmentInteraction(Uri uri) and onListFragmentInteraction(DummyContent.DummyItem item).
If you want the app to show more details of an item in RecyclerView when it is clicked, input code within onListFragmentInteraction(DummyContent.DummyItem item) method.
[java]
@Override
public void onFragmentInteraction(Uri uri) {
}
@Override
public void onListFragmentInteraction(DummyContent.DummyItem item) {
//Insert code here if you want to the app to do something when an item on RecyclerView is clicked.
//It is often used to show an Item’s detail information.
}
[/java]
Finally, we need to modify onNavigationItemSelected(MenuItem item) method. Here is the full codes within the method:
[java]
@SuppressWarnings("StatementWithEmptyBody")
@Override
public boolean onNavigationItemSelected(MenuItem item) {
// Handle navigation view item clicks here.
int id = item.getItemId();
Fragment fragment = null;
if (id == R.id.nav_camera) {
fragment = new BlankFragment();
} else if (id == R.id.nav_gallery) {
fragment = new ListFragment();
} else if (id == R.id.nav_slideshow) {
} else if (id == R.id.nav_manage) {
} else if (id == R.id.nav_share) {
} else if (id == R.id.nav_send) {
}
// Insert the fragment by replacing any existing fragment
FragmentManager fragmentManager = getSupportFragmentManager();
fragmentManager.beginTransaction().replace(R.id.mainFrame, fragment).commit();
// Set action bar title
setTitle(item.getTitle());
DrawerLayout drawer = (DrawerLayout) findViewById(R.id.drawer_layout);
drawer.closeDrawer(GravityCompat.START);
return true;
}
[/java]